

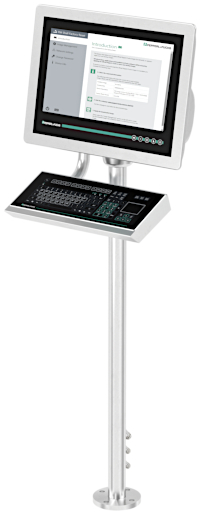
Operating System Management for Thin Clients and Remote Monitors
You are using Pepperl+Fuchs thin clients and/or remote monitors and would like to
A) perform a reset to the factory settings,
B) create a back-up image of your existing OS installation,
C) obtain and install an upgrade to Windows Enterprise IOT 2019 LTSC for your existing installation,
D) or create an OS image via the clone function and deploy it on several thin clients or remote monitors?
The combination of our newly improved factory reset in version 6 and RM Shell and VisuNet Control Center enables highly efficient OS management of your thin clients and/or remote monitors. In the following, you will get a short overview of the respective functions and how to proceed in each application. However, if you have any questions, please do not hesitate to contact us via the contact form. Our experts look forward to meeting you.
A) Performing a Reset to Factory Settings
Factory reset allows users to reset their box thin clients or remote monitors to the original Pepperl+Fuchs system state. All information, applications, and installed third-party software are deleted by using the default "Factory Reset" option, and uploading the official Pepperl+Fuchs image.
1. Request that your sales contact provides you with the official Pepperl+Fuchs image. Please use the contact form for this purpose.
To the contact form
2. Boot into the factory reset via the RM Shell (→System settings→General→Expanding the "Factory Reset" section)
Alternatively: Start your thin client/remote monitor and interrupt the first boot sequence by repeatedly pressing "F9" to enter Factory Reset 6.
3. Use the "Image Management" tab to import the official image. Detailed information about this process can be found in the RM Shell manual.
To the manual
If you would like to restore the software of your device to its original state without any third-party applications, please use the following link to obtain an image of your original installation from us completely free of charge, and carry out the installation steps described above.
B) Creating/Obtaining a Back-Up Image

A back-up image can be created for each thin client, which includes the current status of the device, including its operating system, and all third-party applications. Use the factory reset function for this:
1. Boot into the factory reset
2. Create a back-up image of your device and store it within your network or on a suitable USB device. Detailed information can be found in the RM Shell manual.
To the manual
Alternatively: Instead of using the factory reset function, you can also perform this process very efficiently via the VisuNet Control Center:
1. Use the back-up image wizard. It will guide you through the steps to create a back-up image of your device.
You can restore the status of your device at any time by uploading the back-up image.
Please note: The back-up image can only be uploaded to the device that created it.
C) Obtaining and Installing an Upgrade of Your Existing Installation
Do you have a device running RM Shell 4 or RM Shell 5 based on Microsoft® Windows 10 IoT Enterprise 2016 LTSB and would like to upgrade it to 2019 LTSC? Or do you want to upgrade from RM Shell 5 to RM Shell 6 based on 2021 LTSC? Then, please use the linked contact form to order your appropriate OS upgrade image, and follow the installation steps described in the corresponding quick installation guide.
To the contact form
Quick installation guide: Upgrade to 2019 LTSC
Quick installation guide: Upgrade to RM Shell 6 2021 LTSC
D) Creating and Uploading a Clone Image
Clone image creation is an additional function of the VisuNet Control Center. The clone image is a generic Windows image that can be uploaded on devices with identical hardware configuration. Firmware settings are adopted here. This enables a simple and quick integration of new devices within the network. Use the add-on software VisuNet Control Center to create such clone images, and restore them on any number of devices of the same type.
1. Start the Clone wizard in the Pepperl+Fuchs add-on software VisuNet Control Center
2. Follow the wizard's steps, which will guide you step by step through the cloning process.
3. To upload a cloned image on one or more devices, open the Apply Image wizard in VisuNet Control Center. Follow the individual steps here.
Detailed information on this can be found in the VisuNet Control Center manual.
To the manual


Pepperl+Fuchs AS
Frednesøya 21
3933 Porsgrunn
Norway
info@no.pepperl-fuchs.com
 +47 3557 3800
Pepperl+Fuchs er en ledende leverandør innen utvikling og produksjon av produkter til det globale automasjonsmarkedet. Kontinuerlig innovasjon, høy kvalitet og kontinuerlig vekst danner grunnlaget for vår kontinuerlige suksess i mer enn 70 år. Pepperl+Fuchs-konsernet har i dag mer enn 6300 ansatte globalt. Produksjonen er basert på ISO 9001 og finner sted i Tyskland, USA, Singapore, Ungarn, Indonesia og Ungarn.